Ever have something that works so well for your child that you just want them to be able to use it forever! I do! It is Emmie's sleep sack!

I am really paranoid that she is going to suffocate with blankets- so she has been wearing these things since she was teeny tiny.... See how teeny she was- awww so cute!

Ok so we only have one of these and we aren't planning to have more kids- and I didn't want to buy another one of these things because they are like $25 bucks at most places. Why spend that if I could easily extend the life of the sleep sack, by just adding a band of fleece to the bottom of it and make the arm holes bigger?
SUPER EASY!
I didn't get all the pictures I needed to show you this but it was so easy that you will get the idea! Here goes: and it doesn't have to be perfect- she will just be sleeping when she wears it!
Sleep Sack Extender Tutorial
All you need is:
- - A small sleep sack that your
babylittle angel has almost grown out of - - Sewing machine (or you could do it by hand I suppose if you wanted)
- - A piece of fleece or flannel about 18 x 19 - or however long you want it to be. Use the sides of the sack (inside out) to match up the edges to get your width. Then put your kid in it and see how long it needs to be. I needed a good 9 inches added so that is where the 19 came from (plus seem allowance).
- -Thread- (doesn't have to match)
- I used about a 1/2 seem allowance.
First- With your sleep sack right side out, cut the bottom off- stay close to the seam, and only cut off about an inch in lengh.
Second- Start with your sleep sack RIGHT SIDE OUT.
Take the RIGHT side of the bottom of your sleep sack and the RIGHT side of your fabric (this will be the width side) line up the edges and sew a straight line to connect the two. I just used a straight stich b/c I was using fleece and it doesn' fray. If you are using a material that will fray, just use a tight zig zag stitch.

ALERT!
I don't have a picture of this I AM SO SORRY! I hope I can explain it so you can understand b/c this may be the trickiest part! Just go slow and read carefully.
Third: Flip your sack INSIDE OUT and bring the RIGHT sides of the fabric together and sew down that side, just like you did the first one. This will connect them so you almost have an inside out bag.
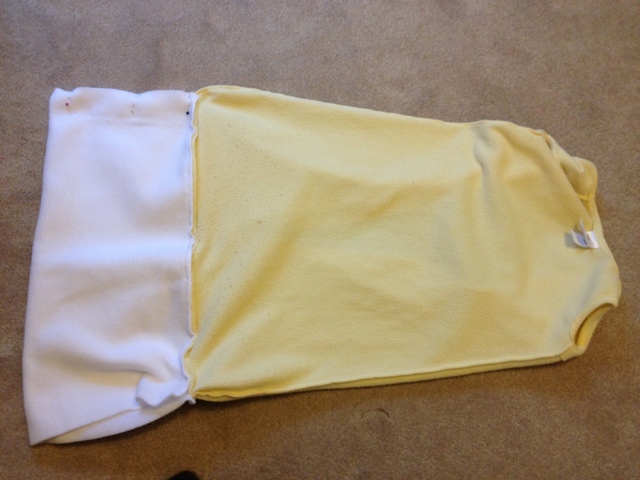
Fourth: Keeping your sleep sack INSIDE OUT........... match up what should be at this point the remaining open sides where the pins are in the photo (your length measurement). And sew down each side.
You are done with that part.
Now on to the arm holes:
First: Turn your sleep sack RIGHT SIDE OUT
(Now this might be painful, but heck you already cut the bottom off the thing! And it isn't going to be THAT purrrrtty in the end, but it will fit your baby better- and remember you didn't have to buy ANYTHING)
Cut a small slit on the armhole seam about an inch down - on both arm holes.

Second- Take it to your machine:

Fold back each edge you just cut and --- sew it down! (foldover twice if you are using a fabric that will fray)- Repeat on the other arm hole

And now you are DONE!

Wasn't that easy? Miss Emmaline even decided she would model it for you!

nope- she doesn't sleep with her bows in--- it's just for cuteness.

It's even trendy color bock-ish --- Hmm- maybe not?

xoxo- Lauren
DO NOT COPY OR REDISTRIBUTE THIS TUTORIAL OR PHOTOGRAPHS CONTAINED IN THIS POST IN ANYWAY.
FOR PERSONAL USE
COPYRIGHT 2013
Great idea! My little one will be outgrowing his soon!
ReplyDelete